Paper bag maker
Paper bag template
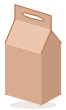
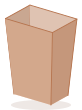
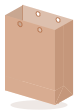
A grocery-style bag with a flat bottom that stands open on a table. Type the width, depth and height, and the template is drawn to that inside size, one per sheet.
How to fold it
Set the printer to 100% scale, not Fit to page, then measure one side with a ruler: it should match the size on screen.
Cut round the outline along the solid lines. Leave the bottom flaps attached to the sides.
Crease each dashed line both ways: the middle line of each side, the two 45° lines at the foot of each side, and the straight line across the front.
Roll the sides into a tube and glue the narrow tab inside one side. Press until the seam is firm.
Fold each side's bottom triangle in so its corners lie on the flaps, fold the front flap up, then glue the back flap over it and press from inside.
To store it flat, push the sides in along their middle creases and fold the bottom up onto the front.
How the template is drawn
Square when open
The walls stand straight and the bottom is a rectangle as wide as the front and as deep as the sides. The back flap lies over the front flap with 12 mm (0.47 in) of overlap.
Creases at the foot
Each side has a crease down its middle. Two 45° creases run from its bottom corners up to that crease and meet it 22.3 mm (0.88 in) above the bottom, level with the straight crease across the front.
Pressed flat
The sides fold in along their middle creases and the bottom folds up onto the front. Flat, the bag is 70.1 mm (2.76 in) wide and 140 mm (5.51 in) long: as wide as the front, as long as the walls.
Depth and height limits
The depth can never be more than the width, since each side folds in by half the depth and at equal width and depth the two would meet in the middle. The walls are at least as tall as the bag is deep, so the bottom can fold onto the front.
Glue tab
The seam's glue tab is 12 mm (0.47 in) wide: 12 mm by default, and 5 to 25 mm if you change it in Settings. Its lower end is cut at 45° so it clears the foot of the side it is glued into.
Panels drawn for the board
Each panel is one board thickness bigger than the inside size you type, so the bag holds that size: 0.25 mm for cardstock, 0.1 mm for regular paper. The folds were checked both open and pressed flat.
Lunches, party favors and popcorn
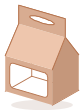
A lunch bag carries a sandwich and fruit; a small one holds party favors, candy or a handful of popcorn. Start from the Lunch shape, or pick Square or Wide for a flatter or broader bag, then type your own numbers. The bag has no handles and a plain rim: for a handle or a ribbon, see the gift bag, or the gable box with its carry handle.
Regular 80 to 100 gsm paper makes a soft bag for light things. For a bag that stands up alone, use 160 to 250 gsm cardstock, and with the heavier card score the 45° creases firmly before folding. A heavy load needs a base: cut a piece of card to the bag's inside width and depth and lay it in the bottom to spread the weight. For a popcorn treat, the popcorn box stands on a table; for a small favor, the favor pouch or envelope pouch; and for a slice of cake, the cake box. Something rigid, like a mug or a bar of soap, travels better in a tuck end box.